This guide covers how to manage your personal settings and the settings for each of your projects, including how to stay updated with notifications and collaborate with your team.
1. Your Profile Menu #
To access your personal account settings and other legal information, click the Profile Menu icon (the three horizontal lines) in the top right corner of the screen.
This will open a sidebar menu with two main sections:
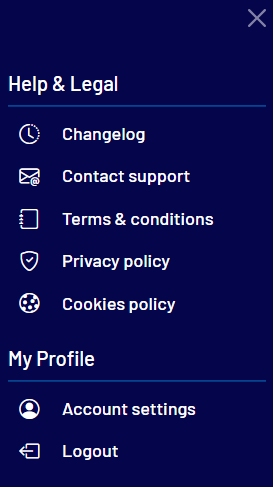
- Help & Legal: Here you can find links to our Changelog, Contact Support, Terms & Conditions, and other policy documents.
- My Profile:
- Account settings: Click here to manage your personal profile details and notification preferences.
- Logout: Securely log out of your Kalever account.
2. Managing Your Notifications #
You receive notifications for important events across all projects you are a member of. A red number on the bell icon indicates new, unread notifications.
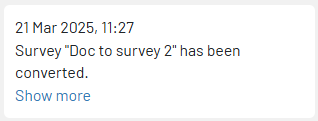
Click the bell icon to see a dropdown list of your recent notifications. Each notification provides a summary of the update and a “Show more” link to navigate directly to the relevant project.
To control how often you receive these notifications by email:
- Navigate to the Profile Menu > Account settings.
- Find the email notification settings.
- Choose your desired frequency from the dropdown menu (e.g., Never, Every 30 mins, Every 24 hours, etc.).
3. Adding and Managing Project Members #
To collaborate with your team, you can add them as users to a specific project.
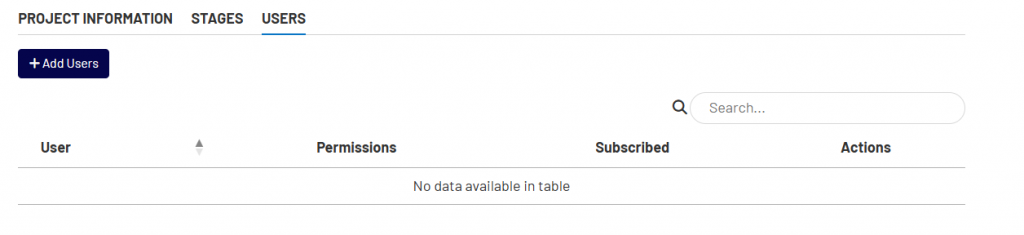
- From the Home Screen, click on a project to enter its Project Dashboard.
- Locate and click on the USERS.
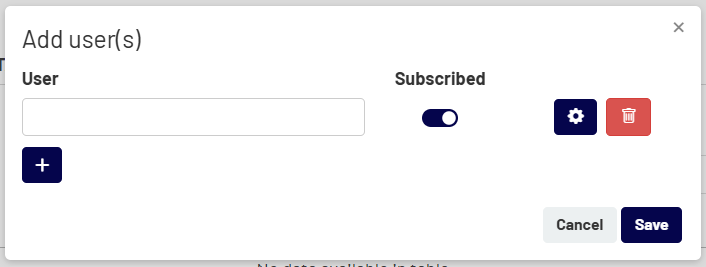
- Click the “+Add Users” button.
- Enter the user’s email address. Note: Only existing company users can be added to a project.
- Set the appropriate permissions for that user within the project, such as access to specific tools or administrative rights.
- Turn on or off subscription for this user. This will turn on/off the notifications for the specific project
- Click Submit to save the changes. The new member will now have access to the project.