From the Project Dashboard, click the Survey Creator button to begin. You will be taken to the Survey Creator hub, which lists all the surveys within your project and provides three ways to start a new one.
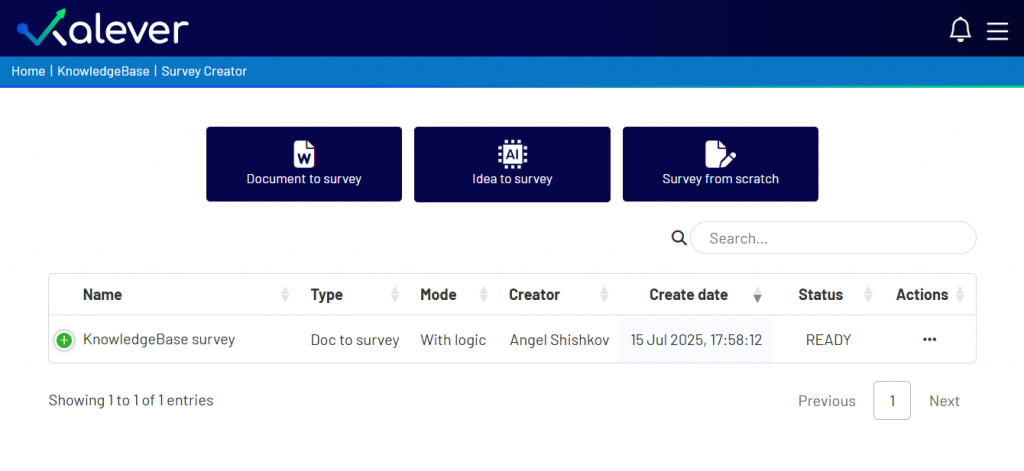
Below is a step-by-step guide for each creation method.
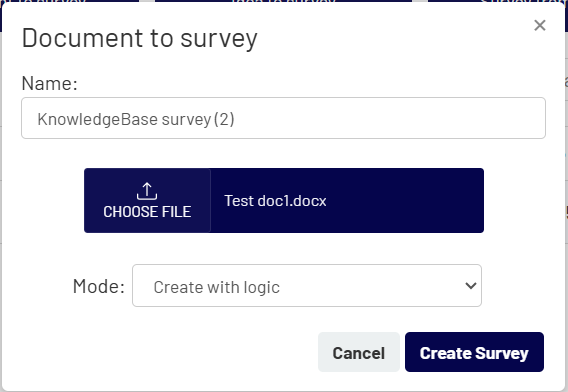
Option 1: Document to Survey #
This is the best option when you already have a complete questionnaire in a Word document.
- Click the Document to survey button.
- A pop-up window will appear.
- Name: Give your survey a clear, descriptive name.
- Upload File: Drag and drop your Word document into the designated area, or click CHOOSE FILE to browse for it on your computer.
- Mode: Select the drop down to chose if you want your survey to be generated with or without logic.
- Click Create Survey. The system will analyze your document and build the survey for you.
Option 2: Idea to Survey #
Use this AI-powered tool to generate a survey draft from a simple concept or idea.
- Click the Idea to survey button.
- A pop-up window will appear.
- Name: Give your new survey a name.
- Detailed instructions: Write a clear prompt that describes your research goals. Include the topic, target audience, desired number of questions, and any other key details. The more specific your prompt, the better the result.
- Click Create Survey. The AI will generate a tailored survey based on your instructions.

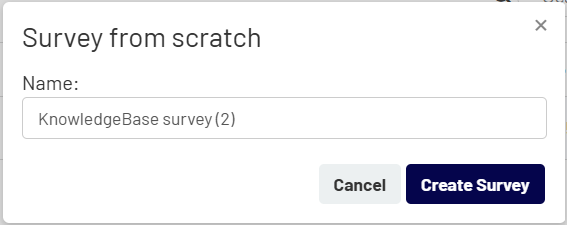
Option 3: Survey from Scratch #
Choose this method to build your survey manually from a blank canvas.
- Click the Survey from scratch button.
- A pop-up window will appear.
- Name: Enter a name for your survey.
- Click Create Survey. You will be taken directly to a blank survey editor, ready for you to start adding questions.
Next Steps #
After creating a survey using one of these methods, you will be taken to the Survey Editor. This is where you will customize your questions, add logic, and manage the survey’s content.