Creating a new project in Kalever is your first step to organizing your research. This guide will walk you through the process.
Step 1: Open the New Project Window #
From your main Home Screen, click the + New Project button located in the top-left corner.
![]()
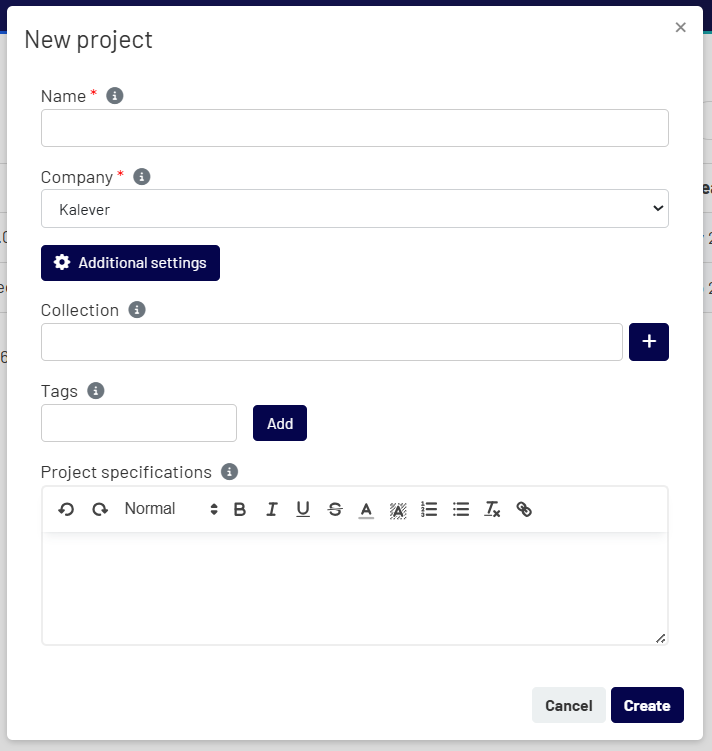
This will open the “New project” pop-up window, where you will enter all the project details.

Step 2: Fill in the Project Details #
In the window, you will need to provide the following information:
- Name (Required): Enter a clear and descriptive name for your project.
- Company (Required): Select the company the project will be created under from the drop-down menu.
Step 3: Use Additional Settings (Optional) #
Click the Additional settings button to reveal more options for organizing your project:
- Collection: You can group this project with others by assigning it to a collection. Either type to search for an existing collection or click the + button to create a new one.
- Tags: Add descriptive tags to your project. This makes it easier to search for and filter later. Simply type a tag and click the Add button.
- Project specifications: Use this text editor to enter any detailed notes, scope, or other important information that all project members should see.
Step 4: Create Your Project #
Once you have entered all the necessary information, click the Create button at the bottom right of the window. Your new project will be created and you will be taken to its Project Dashboard.