After your data has been processed, you will be taken to the main Codebook Editor. This is a powerful interface where you can review, clean, and finalize the coding of your open-ended data.
The editor has three main views, accessible via tabs at the top: Codebook, Coded data, and Original data.
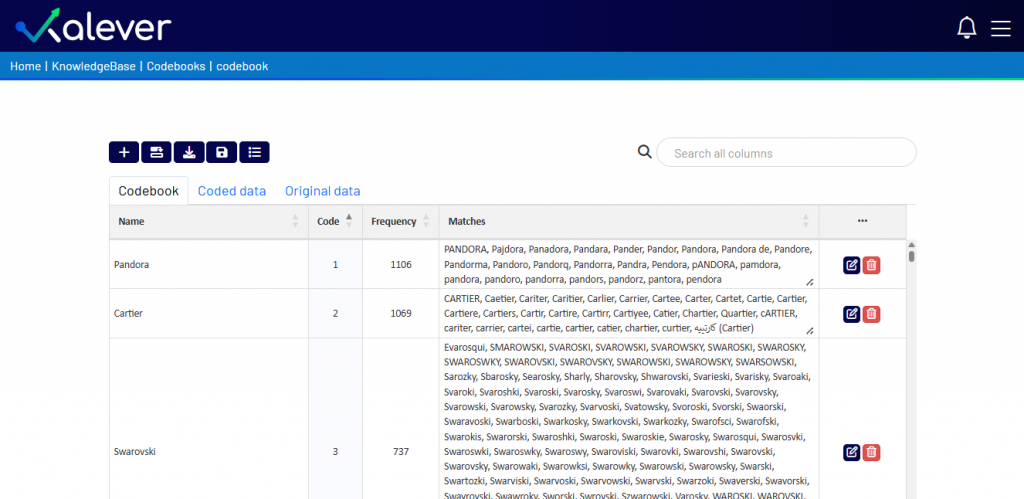
1. The Codebook Tab (Main View) #
This is the primary workspace for coding. It displays a table where each row represents a unique “code” that the system has identified from the open-ended responses.
- Name & Code: The name of the code and its assigned numeric value. These can be edited directly by clicking on them.
- Frequency: Shows how many times this specific code appeared in the data.
- Matches: Displays all the variations of open-ended responses that have been grouped under this code.
Toolbar Actions:
Above the table is a toolbar with several key functions:
- Add Code
 : Manually add a new code to your list.
 - Update frequency cutoff
 : Adjust the count of occurrences to be coded as a separate code
 - Download
 : Export your finalized codebook or the coded data as an Excel file.
 - Save
 : Save all changes you have made to the codebook.
 - Show Logs
 : View a detailed log of the processing and coding actions.
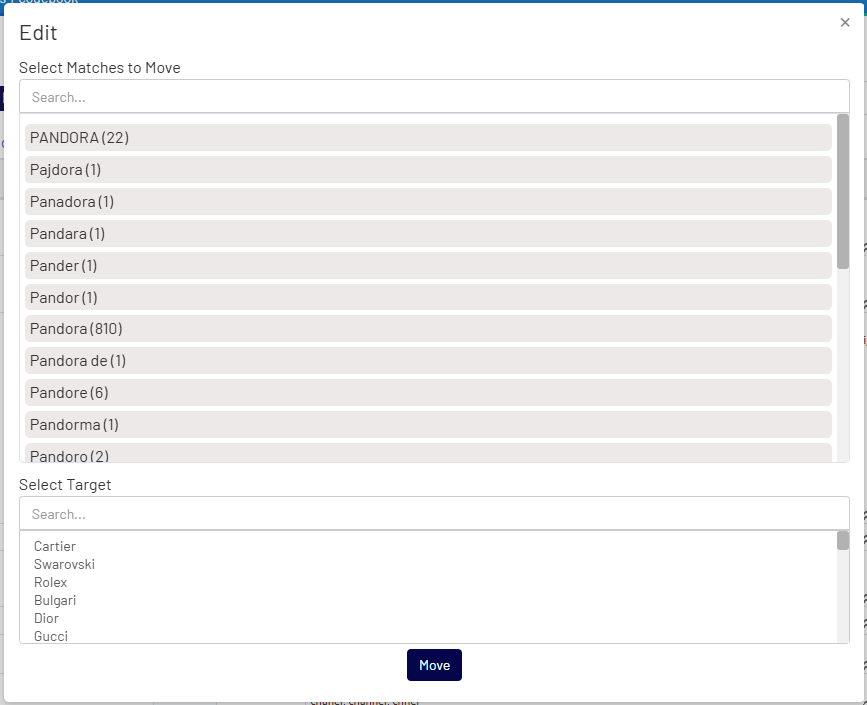
2. Editing and Merging Codes #
The most important task in this interface is refining the codes. You can move miscategorized responses or merge similar codes together.
- In the Codebook tab, find the row containing the matches you want to re-assign.
- Click the Edit icon
 on the far right of that row.
 - The “Edit” pop-up window will appear.
- Select Matches to Move: From the top list, click on one or more responses that you want to move to a different code.
- Select Target: In the bottom list, search for and select the correct “target” code where the selected matches should belong.
- Click the Move button. The selected responses will be merged into the target code, and the frequency counts will update automatically.
3. Viewing Your Data #
- Coded Data Tab: This tab shows your dataset with the original open-ended text replaced by the new numeric codes you have defined, making it ready for quantitative analysis.
- Original Data Tab: This tab provides a read-only view of the raw, unprocessed data exactly as you uploaded it. This is useful for reference or for double-checking the original verbatims.