TrackEntry is your project’s central hub for communication and issue tracking. It allows your team to leave comments, report issues, and track the progress of a survey, all in one place.
You can access TrackEntry in two ways:
- From the Project Dashboard, click the TrackEntry button.
- If TrackEntry is integrated with a live survey, a TrackEntry icon will appear in the survey link for easy access during testing.
The Main TrackEntry View #
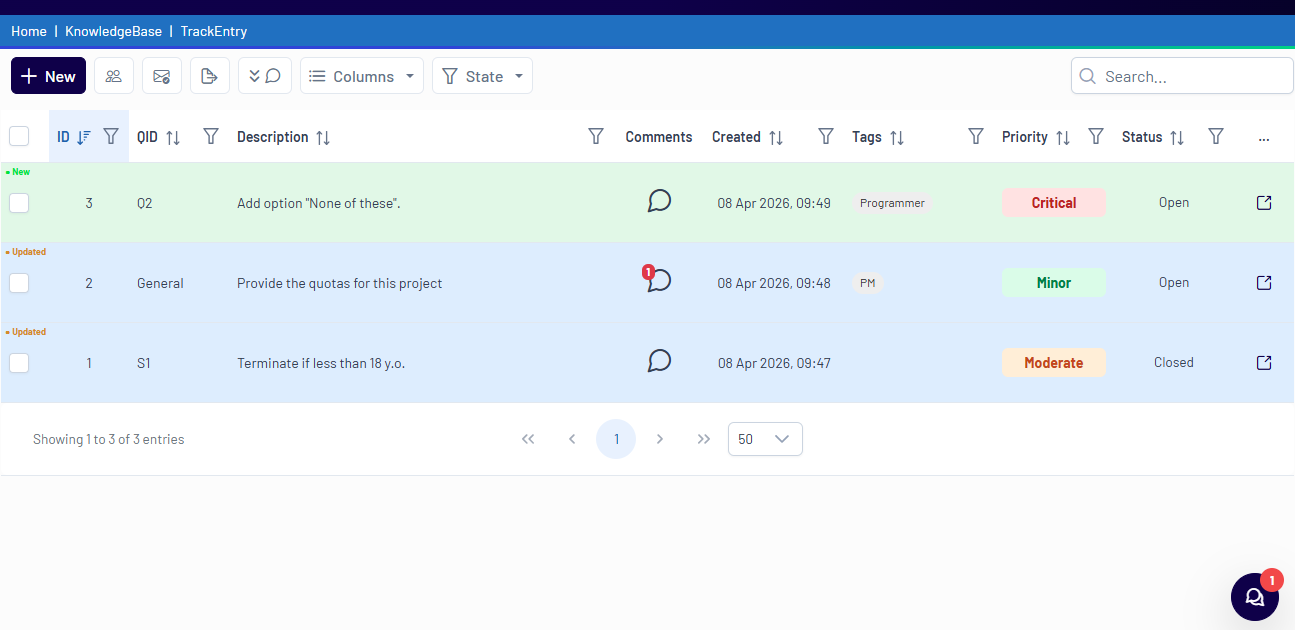
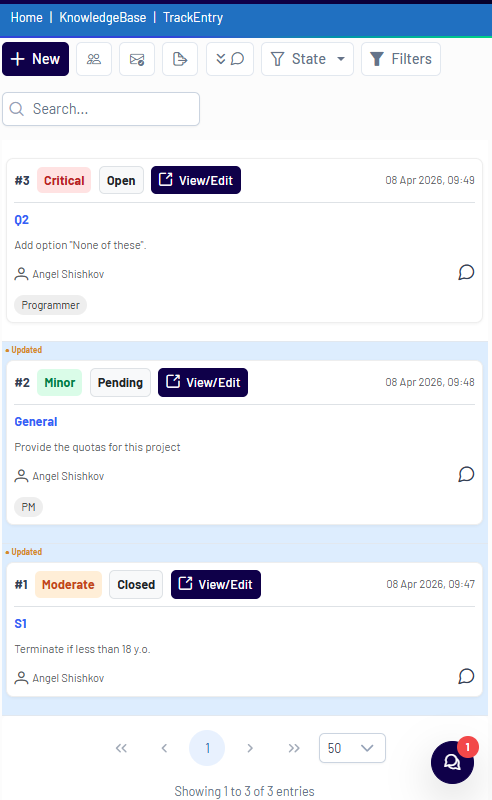
When you open TrackEntry, you will see the main dashboard, which lists all the entries for the current project. The dashboard table has two display modes depending on your device size.
Full table view (larger screens)
Compact view (smaller screens)
Here is a guide to the main components:
1. Top Menu #
At the top left, you will find the main TrackEntry toolbar.

- New Entry
 : Create a new entry for feedback or a task.
 - Members
 : View the members of the TrackEntry project.
 - Email Summarizer
 : Paste feedback emails, optionally translate them into English, and let the AI convert them into entries. Before importing, you can:
- Select which entries to include
- Add tags to help distinguish them from other entries
- Update their priority and status as needed
- Export table
 : Export entries, comments, and attachments into an Excel file.
 - Expand comments
 : Expand all comments in the table view.
 - Column Display
 : Customize which columns are visible in the entry list.
 - Global State Filter
 : Filter the list to show only specific entries (e.g., New, Updated, etc.).
2. The Entries List #
The central part of the screen is the list of all entries. Each row is a separate entry and contains key information at a glance:
- ID / QID: The unique ID for the entry and the corresponding question ID it relates to.
- Description: A summary of the entry’s content.
- Comments: An icon indicating the number of new comments on an entry.
- Tags, Priority, and Status: See organizational tags and the current state of the entry (e.g., Minor priority, Open status).
3. Live Chat #
In the bottom right corner, you will see the Live Chat icon  . A red number indicates new, unread messages. Click this icon to open the project’s chat window for real-time discussions with all project members.